I have some news to share. I won’t say it is “exciting” news, because that feels presumptuous. The news is that I have bought a domain for this blog. The blog can now be found at this new URL: https://www.genehikesapptrail.blog
The biggest change you will notice, aside from the location, is that there are no more ads to sift through. That was not the main reason I decided to pony up cash, but it is the one most noticeable to you the readers.
The impetus behind this change was because of storage. A free plan got you 1GB of storage, but the cheapest paid plan is 6GB. The lack of storage for a free blog meant that I have been compressing almost every image I have uploaded. I do not wish to spend time compressing anything before uploading while I’m on the trail, so I needed to pay for more storage space. As someone who used Lynx text-only browser in the ’90s, I never dreamed I would ever say 1GB of storage was too little.
Since the paid plan is good for one year, this purchase should last until the thru-hike is over. I’ll probably continue compressing files until the actual hike begins, but once it does I will be uploading everything in source quality. I want you to be able to experience the awe and wonders of the trail just as I will.
To celebrate this announcement, we are doing our first and only Content Week[TM]. Starting on Wednesday, September 23rd, I will be posting a new article every day for one whole week. I am heavily biased, but I feel like I have a good crop of fresh posts to keep you entertained for the entire week.
Speaking of September 23, the annual AT hangtag color vote is going on right now. It ends on the 23rd, so if you are planning on doing a thru-hike next year, make sure you get your votes in. You can vote once per day.
I have another announcement that I’ll shoehorn in here as well. There is about to be a tonal shift in this blog. For the past six months I have been blogging about getting ready for the Appalachian Trail. However, it has not felt much different from a fitness blog or a weight loss blog. Lots of hiking day trips and silly things that may have crossed my mind, but not a ton of real content about things important to thru-hiking specifically. Moving forward, while I do want to continue doing hikes and fitness stuff, I want to start focusing in on the nitty gritty of what next year entails.
Expect more gear reviews, planning tips, and overnight trips. Since it is finally under 100 degrees every day and the six month long Austin summer is winding down, I hope to bivouac at McKinney Falls and Bastrop State Park at a minimum during the fall. Those should be great occasions to stress test my gear and figure out which items are worth it and which ones need to be replaced before March. Those are the kind of things I expect to discuss way more over the next six months.
In chapter 11 of the Book of Judges we are introduced to Jephthah. He is the bastard son of Gilead and gets forced into exile because his legitimate brothers will not share their inheritance with him. While in exile, he is exhorted to lead Israel’s armies against the Ammonites.
Before the fateful battle, Jephthah prays to God for assistance. In return he vows to make a burnt offering of the first person to emerge from his house. God delivers a victory for Israel and when Jephthah returns home his only daughter is the first person that comes out to meet him. Awkward. Being a man of his word, he made an offering out of her.
In the twelfth chapter, the Ephramites threaten to burn Jephthah’s house down. Not because he killed his daughter, but because he fought the Ammonites without asking their help first. Jephthah goes to war with the Ephramites and routs them. As the Ephramites attempt to flee over the river, the Gileadites make everyone who tries to cross pronounce the word “shibboleth”. Because of linguistic differences, Ephramites pronounced the word as “sibboleth” making it easy to know which ones to allow to cross the river and which ones to kill. 42000 Ephramites died, so the method was coldly efficient.
Anyway, that story is where we get the word “shibboleth” which is any word or phrase that can be used to distinguish between in-groups and out-groups. One common shibboleth is in the way place names are pronounced. People local to an area will know the pronunciations, but tourists or recent arrivals will get tripped up and mark themselves as part of the out-group.
Living in Las Vegas, the most common shibboleth was the pronunciation of the state name. Locals would say it correctly as “ne-VADD-uh”. People whose sole purpose in life was to crawl into casinos and empty their wallets so we could avoid paying state income taxes would pronounce it “ne-VODD-uh” or some other appalling way.
Massachusetts was full of geographical shibboleths. This happens when the place names are a melange of American English, British English, and Native American words. Then each word gets filtered through a heavy Bawstin accent. This is how you wind up with Worcester pronounced “WOO-stah” or Cochituate as “co-KIT-chew-it”.
Like those states, Texas also has shibboleths. I dare anyone to say Pedernales correctly the first time you see it. One big one in Austin guaranteed to trip you up within your first month of moving here is Manor. Pronounced “MAY-ner”. Manor is a suburb east of Austin where a host of commuters live.
Okay, I’m going somewhere with this meandering introduction. Manor is important to this post because there is an Austin To Manor bike trail that runs five miles and terminates at Johnny Morris Road in east Austin. Just on the other side of the street from the end of that trail is the northern end of the Southern Walnut Creek Trail. I did the Northern Walnut Creek Trail earlier this spring, so it was only a matter of time before I grabbed the 25 pound backpack and attacked this one too.
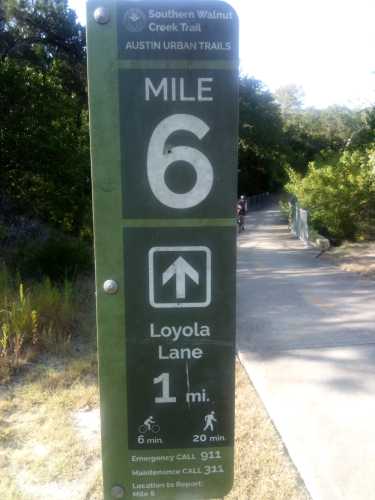
First things first, this trail was very wide and well kept. It definitely functions chiefly as a bike trail with hiking being a second priority. The entire thing was paved with almost no potholes or visible cracks or anything. Every section had lots of signs about upcoming curves and reminders to slow down in hilly sections. I enjoyed it as a hiker, but I feel like if I was a biker this would be my favorite trail by a wide margin. Oh, and there were lots of trees and shade. This was great because Austin is currently in the grips of a seemingly never ending run of consecutive 100 degree days in August.
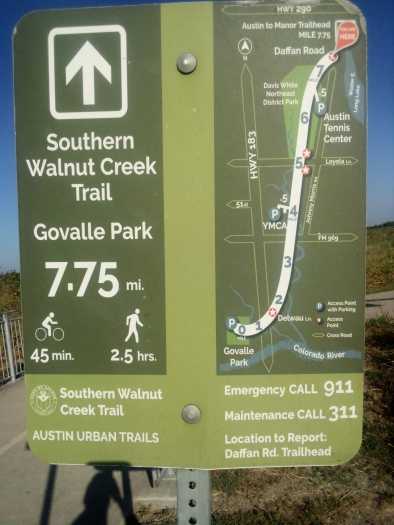
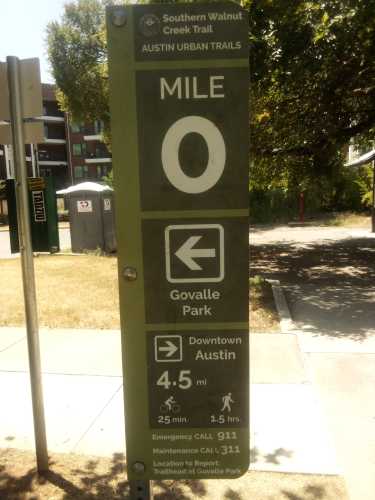
Second thing second, you’ll notice that the sign is showing the miles to the end of the trail instead of beginning at mile zero. Mile zero is on the southern end closer to downtown. I started on my less preferred end for two significant reasons.
One, the northern end is difficult as fuck to get to using public transit. I had to take two buses and then hoof it almost two miles to reach the start point. Conversely, the opposite end was only about a quarter mile from a bus stop. I figured it would be better to inconvenience myself at the beginning of the day before it got too hot than to walk the entire trail and then have an hour of walking to look forward to.
Two, doing it this way allowed me to go somewhere exciting close to the mile zero marker. Sort of like the pot of gold at the end of the rainbow. I’ll leave exactly what that place was until the end of this post.
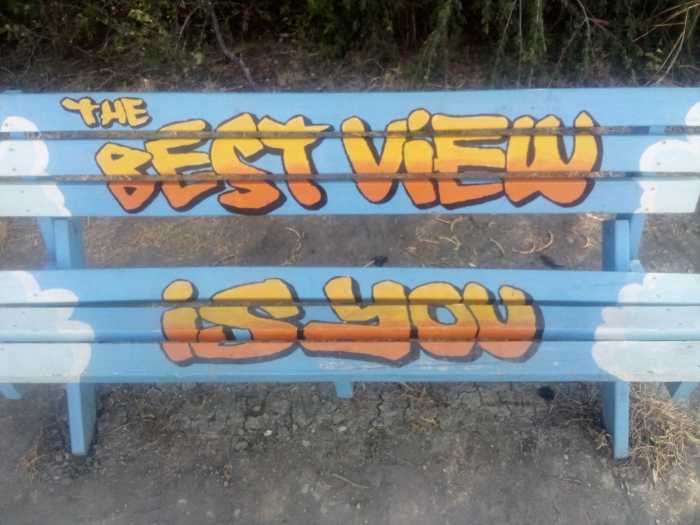
One of the more interesting sights along the first couple of miles was this painted bench.
I’d like to say, for the record, that whoever painted this bench never saw my face. If they had they would never say it was better than any view. In all fairness though, I guess I need to share the view from this bench before I can say it is definitely better than my visage.
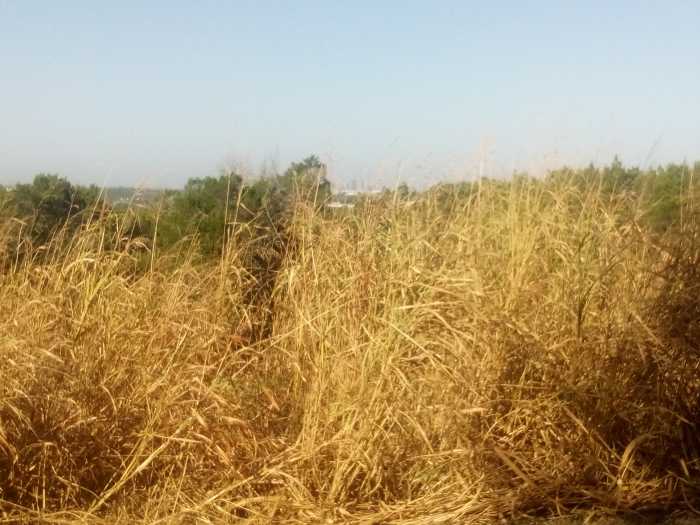
You can make out a faint view of downtown beyond the green trees. If you can get past the mountain of tall, brown, dead and dying grass. In addition to being 100 degrees every day in August, water has been in short supply. The airport has seen a grand total of 0.02 inches of rain this month. Most every living thing in town is either slowly dying outside or complaining inside in their underwear sitting next to the air conditioner.
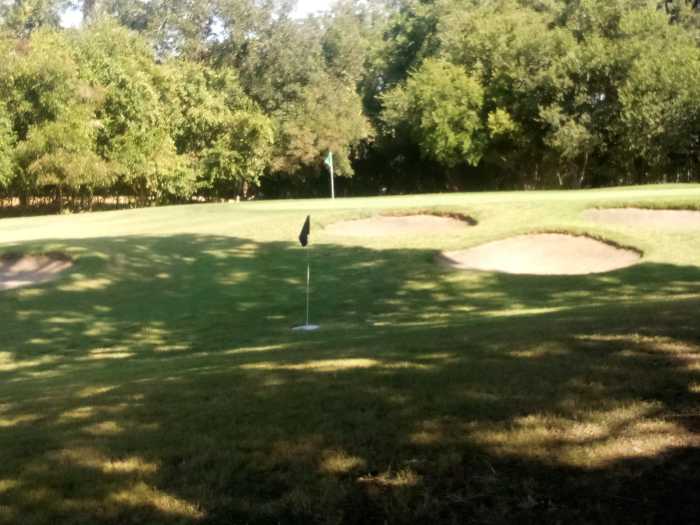
The trail meanders along for a few miles and then runs along beside Harvey Penick Golf Campus. In addition to a nine hole golf course, they also host a footgolf course. Footgolf is pretty much what you think it is. You kick a soccer ball around a golf course until you kick it into an oversized hole. Fewest kicks wins.
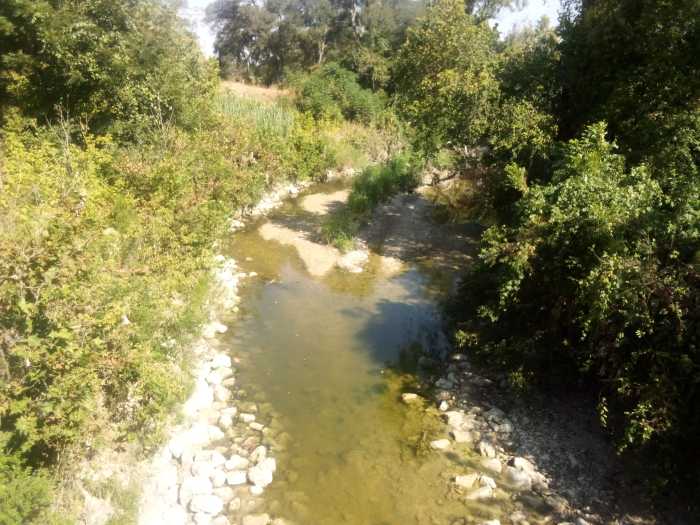
At least you could see some green grass on the golf course. Check out this bridge over Walnut Creek that showed how low the water level was.
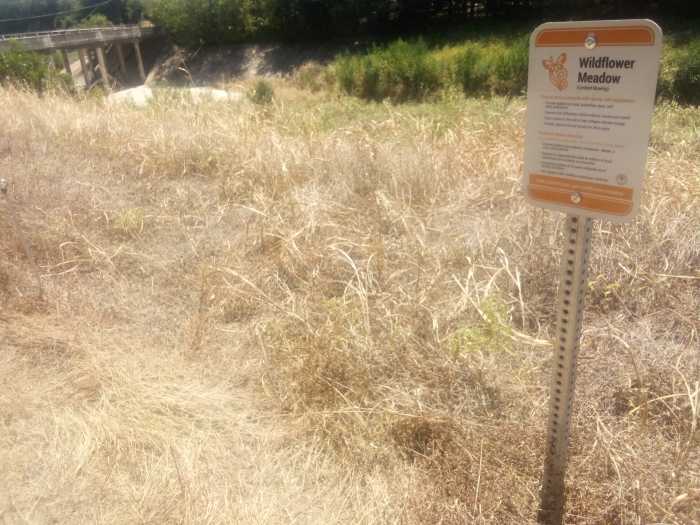
Not to belabor the dryness in Texas right now, but I’m going to do just that. The Ross fire continues to rage west of the Metroplex. Honestly, as bad as conditions are it could have happened anywhere in the Lone Star State. I passed a “wildflower meadow” in name only.
If nature’s first green is gold, then her last green is brown. With apologies to Robert Frost, I’d like to wax poetic about summertime in Austin.
Nature’s last green is brown, once you notice it gets you down.
As temperatures climb ever higher, everything might catch fire.
This recap might make it seem like I was depressed the entire trip, but that would be far from the case. Truth is, Austin always gets hot and dry in the summer. It’s not as bad as Lake Powell or anything, so we’ll be just fine. Fingers crossed.
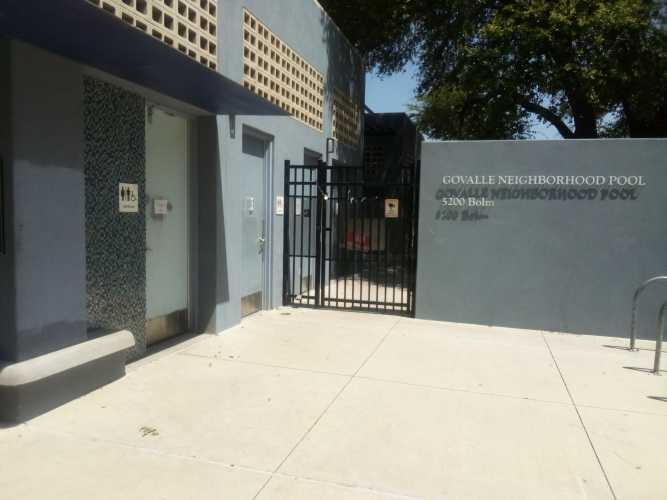
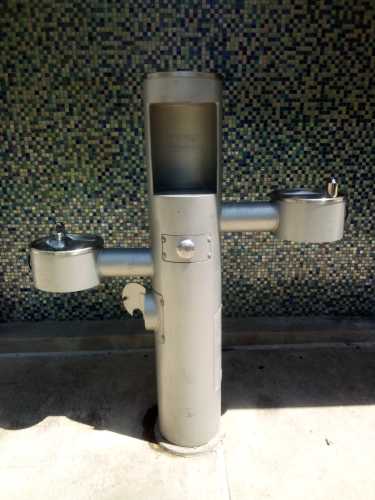
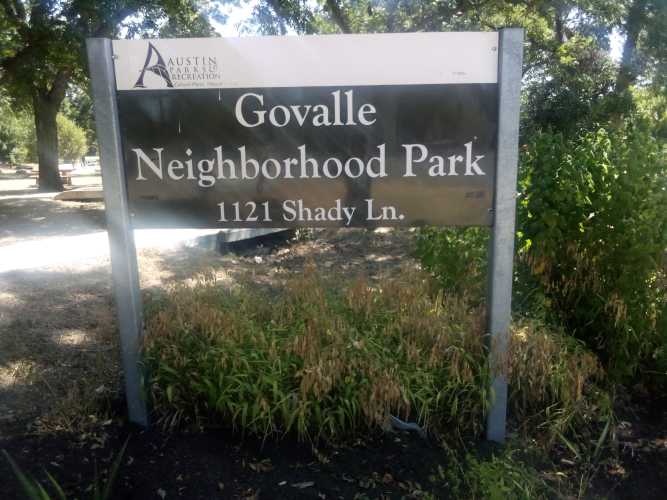
Nothing much eventful happened until I reached the southern end of the trail at Govalle (pronounced “go-VAL-ee”) Neighborhood Park. Remember when I said earlier that this trail catered to bike riders? Once I got to Govalle Park I realized that there were no bathrooms or water fountains anywhere along the main trail. Fortunately the park had nice restrooms and water fountains with faucets for filling water bottles.
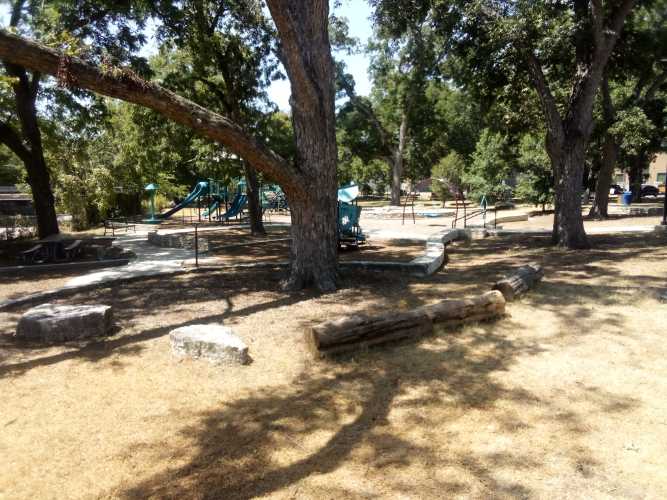
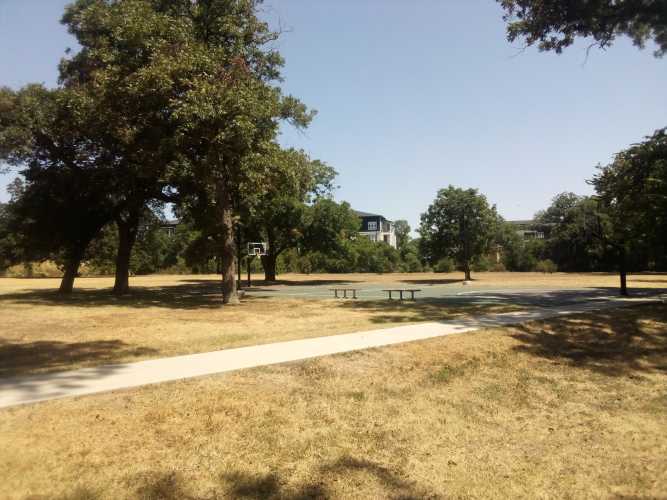
I took a few other pictures at Govalle Park, so I might as well show them off here.
After milling around in the park for a while, it was time to go check out that sweet mile zero marker and bring this hike to an end.
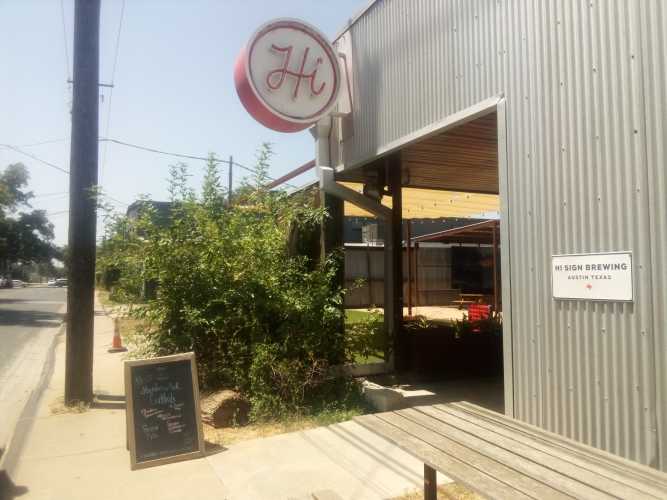
But, of course, this was not really the conclusion because I promised a pot of gold at the end of this rainbow. I walked about half a mile down Shady Lane from the park and found my destination, Hi Sign Brewing.
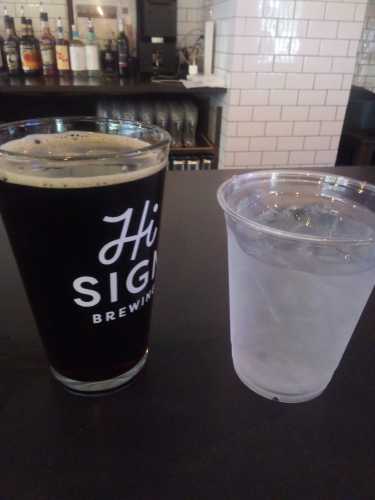
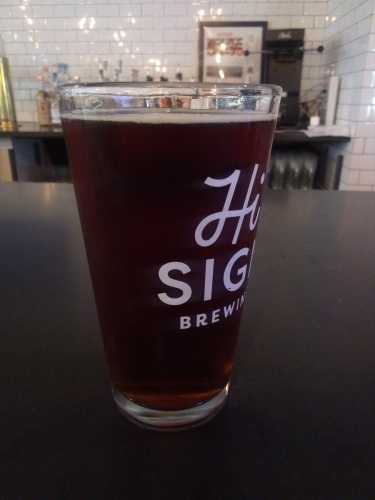
I had to try their Millie Brown Ale, an American brown, and got a cool cup of delicious ice water to stay hydrated.
Both beers were refreshing but, truth be told, the service was less than desirable. Despite being one of only two people at the bar I had to stare daggers into the bartender before she would stop doomscrolling and come over and assist me. I get it, I’m hideously ugly. But does that mean I’m not entitled to good service? I am not an animal!
After the second beer it really was time for my journey to end. I don’t really have a closing statement here, so that’s it. Drive home safe.
To start 183 Trail you just start walking south from somewhere near the intersection of US 183 and US 290 along the 183 service road.
Service roads are a concept I had never heard of before moving to Austin, but I think they’re neat. Any major thoroughfare in Texas has a surface street running parallel to it where businesses live and which you can use to go wherever the highway goes without having to actually get on the highway and deal with highway driving. Obviously, you want to use the highway to go more than 5 miles, but for short trips I always choose to stay on the service road.
This time I threw on the 25 lb. pack and headed out to 183 Trail. This trail was appealing because it measures 10 miles running north-south alongside 183 and 183 Toll Road between northern Austin and the airport. While the other trails I’ve done so far (walnut creek, shoal creek, etc) have all been maintained by Austin Parks Foundation, 183 Trail falls under the purview of the Central Texas Regional Mobility Authority (CMRTA). This means there are some good and (mostly) bad differences between this trail and all of the other ones I’ve talked about previously.
A quick aside here. For reasons I do not entirely understand, 183 service road has four different names throughout Austin proper. It is referred to as Research Boulevard, Anderson Lane, Ed Bluestein Boulevard, and Old Bastrop Highway depending on exactly where you are standing when you are speaking. So as not to confuse anyone reading this, I’ll refer to it only as 183 service road. But just know that here in Austin no one ever does this.
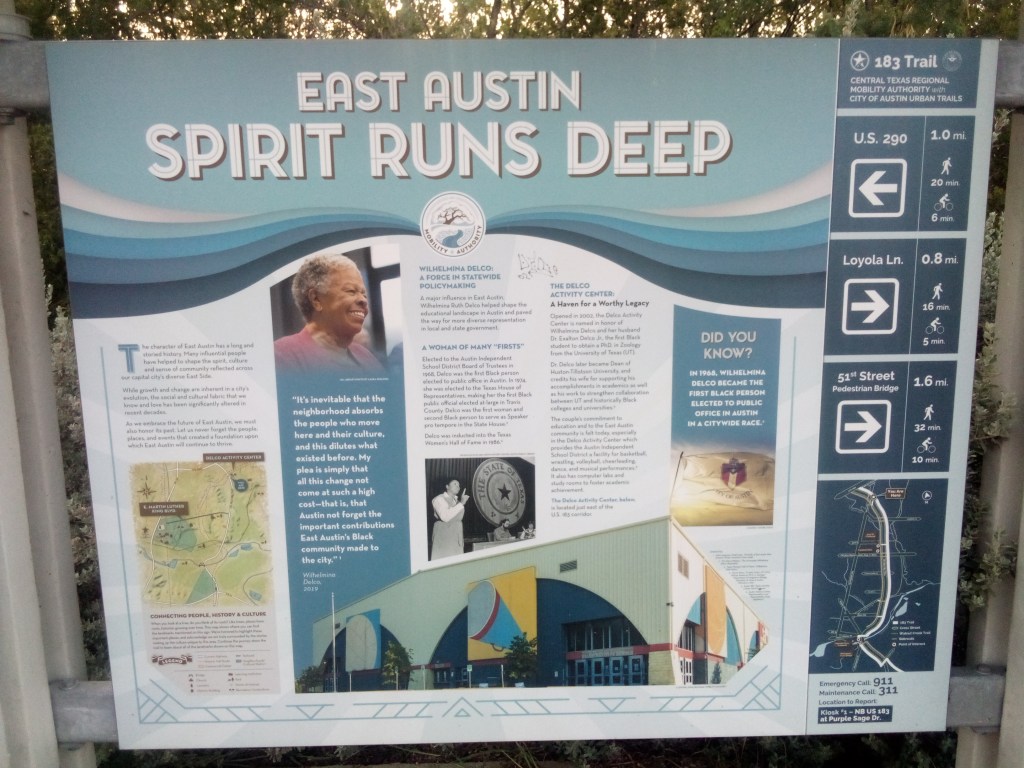
There was no “mile zero” signpost at the beginning of the trail, but there was this informational billboard on the roadside about a mile south of 290. The trail itself referred to these as kiosks, and this was the first one.
click to enlarge
I cannot emphasize this enough. If I had not seen this kiosk, I would have had no idea I was on an actual trail. This was just sidewalk on a busy service road. Cars were whizzing by and the noises of a morning commute filled the air. Most of the time there was no protected bike lane, just a little portion of the service road shoulder carved out.
It continued pretty much exactly like this until I got to Loyola Lane and saw a sign for Davis-White Park. Since the trail was proving to be underwhelming, I figured I would undertake a side quest.
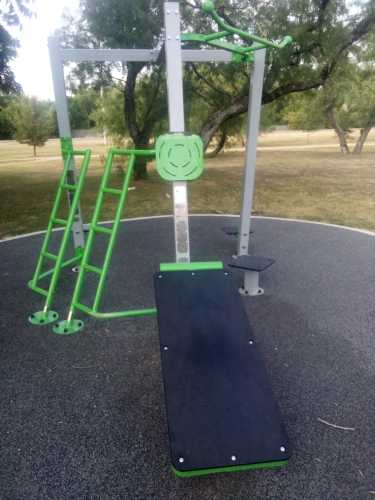
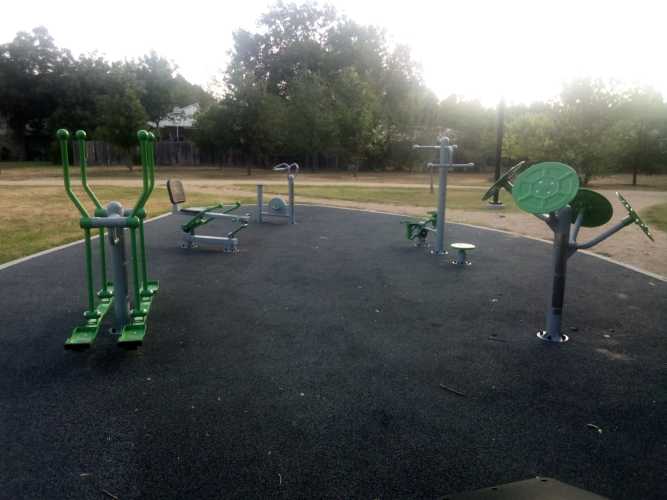
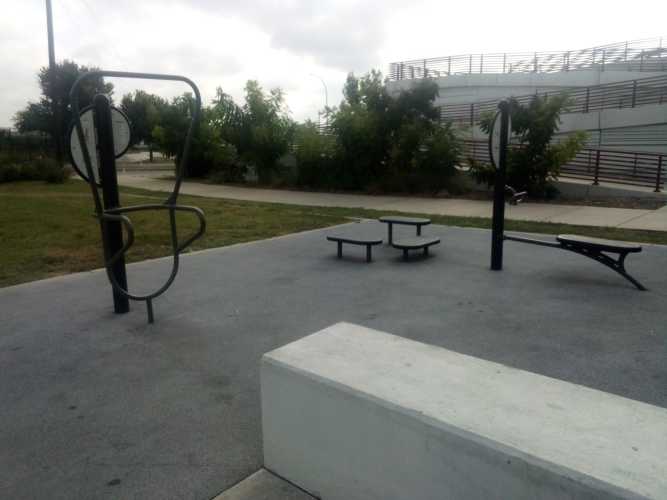
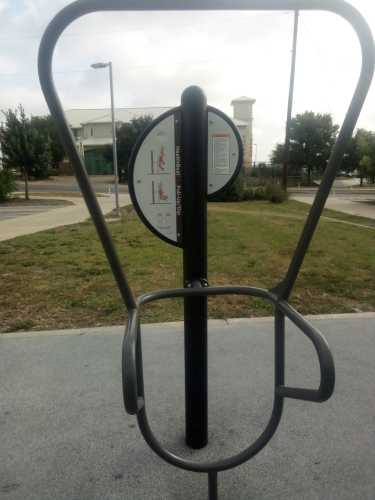
Davis-White Park was named for Willie Ray Davis and Louie White, the first black captains of the AFD and APD. It is almost 20 acres and contains a 1/2 mile walking loop, large open spaces, playgrounds, and there was a food truck there at like 7:45am. Looking back, I probably should have taken some pictures of all that, because it was a pretty cool place. Oh well. I did get some pictures of the outdoor fitness station there. Because of course I did.
Second from the left in the second picture is a body weight rowing machine. I unabashedly love this thing and might ask it to prom. A really good, solid piece of equipment that gave me a great strength and cardio workout in only 2 or 3 minutes of use. I’ve only seen one other example of this in my life, so it was a real privilege to find one here.
Getting back on the trail, the next big landmark was the trailhead at 51st Street. To call it a trailhead was being charitable. It mainly consisted of parking spots, which was nothing to sneeze at but also nothing overly impressive. There was a small fitness area though, so it’s got that going for it, which is nice.
the dip / pull-up station on the left looks like modern art2026. Plastic and metal on concrete.
Directly across the street from the trailhead was the YMCA on 51st Street. Frustratingly, there was a kiosk in front of the YMCA. This meant that in order to see all of the kiosks you needed to bounce back and forth across the street multiple times. And, just to drive this point home, remember that this trail goes along next to a one-way service road that is next to a pretty big roadway with the service road in the opposite direction next to that. You needed to cross all of that to get from one side to the other.
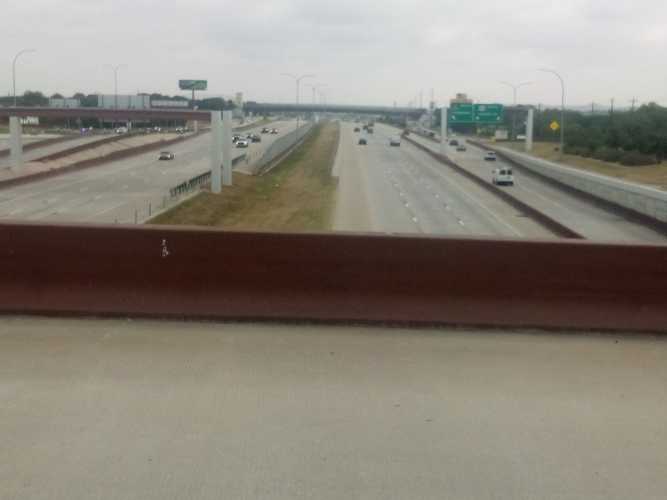
view from a pedestrian bridge over 183
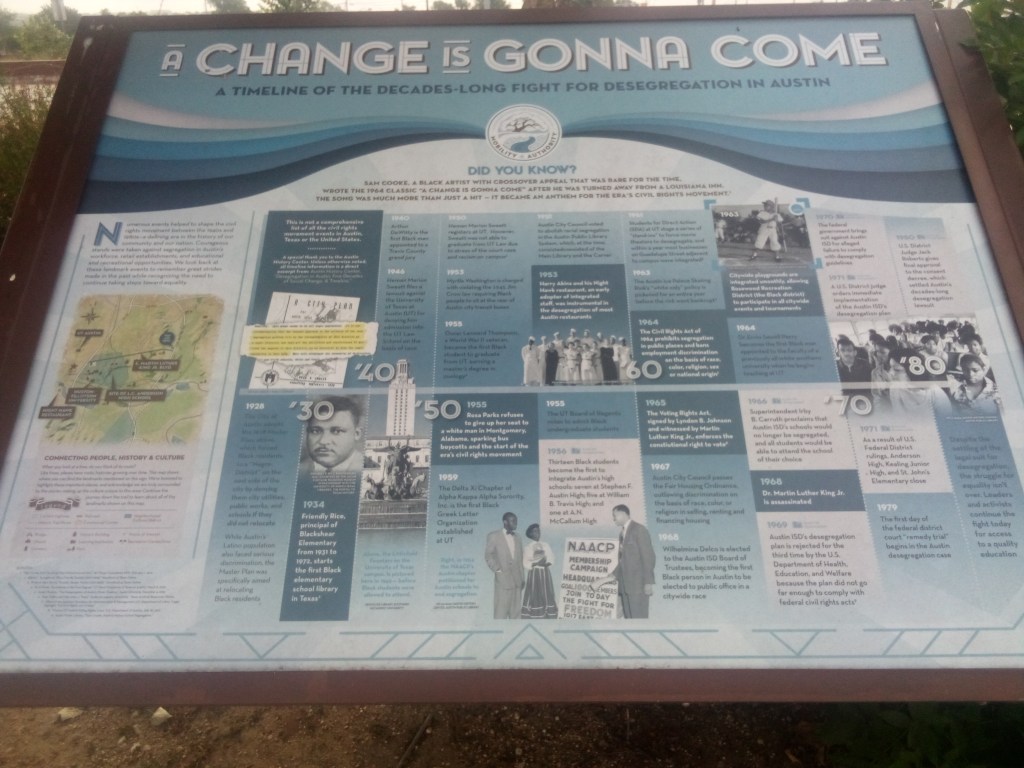
About a half mile from that kiosk, on the opposite side of the street once again, was a cool four-panel exhibit about civil rights in Austin. The four panels were arranged in a semicircle on the northwest corner of the MLK / 183 intersection. Here is one of those panels.
click to enlarge
At this point you may have noticed that I showed you two kiosks and they both deal with minority pride and history. It probably won’t surprise you to learn that East Austin is home to a large population of minorities. However, it may surprise you to find out why that’s the way it is.
Let’s take another small side quest to learn all about the Austin Master Plan of 1928. Before Austin was the weird place where everyone lived in skyscrapers and did stand up paddleboarding, it was just a small but growing Texas city. Blacks in Austin lived in several enclaves all across the city called freedsmen towns. White Austin did not like the idea of so many black residents spread across the area. The 1928 city plan was an excuse to make sure freedsmen towns all over Austin got no support from the city, in an effect to drive all black Austinites into east Austin, where the largest concentration already was. To quote directly from the plan itself:
There has been considerable talk in Austin, as well as other cities, in regard to the race segregation problem. This problem cannot be solved legally under any zoning law known to us at present. Practically all attempts of such have been proven unconstitutional.
In our studies in Austin we have found that the Negroes are present in small numbers, in practically all sections of the city, excepting the area just east of East Avenue and south of the City Cemetery. This area seems to be all Negro population. It is our recommendation that the nearest approach to the solution of the race segregation problem will be the recommendation of this district as a Negro district.
Cough, redlining, cough. The systematic coerced migration of black Austin to the eastern edge of the city was only exacerbated when Interstate 35 replaced East Avenue and bisected the city like a scar. This just made it easier for white Austin to improve and grow while denying those same resources to minority Austin. Just remember that whenever “they” say the things that happen now don’t have powerful, lasting ramifications – they do in fact have powerful, lasting ramifications that outlive most people’s memories of the things that occurred in the first place.
South of MLK after a few miles I came to Boggy Creek. There was a stairway down from 183 to get closer to the creek and see some greenery. Here is a picture showing the creek water level.
It was here at Boggy Creek where I saw a group of maybe five or six birds circling overhead. They were about half a mile away and pretty far up in the sky, so I was not able to identify them or get any photos. But it did make me realize that until that point I had not seen any other birds along the trail. Being so close to such a busy roadway, the birds simply were not anywhere to be found.
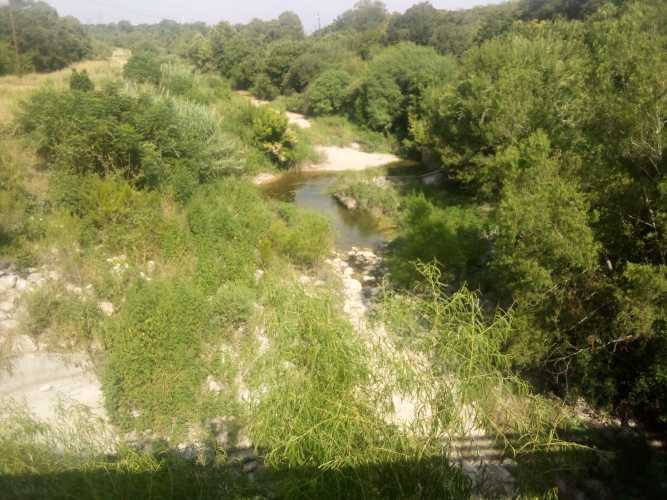
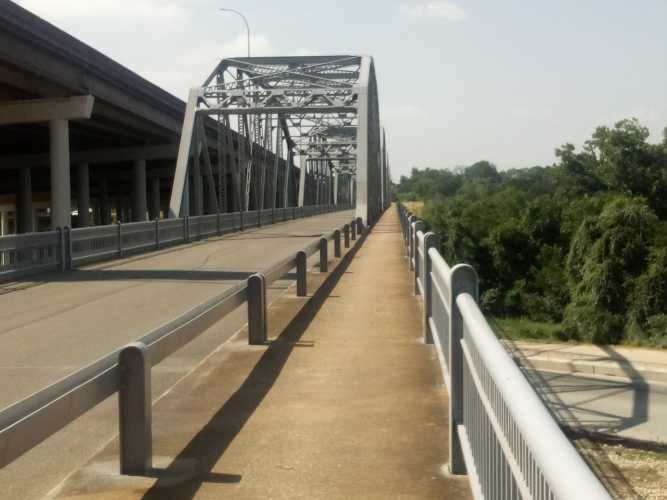
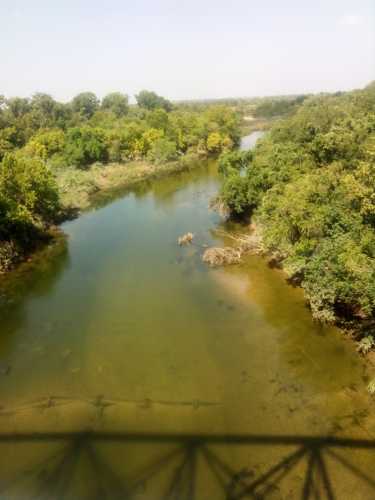
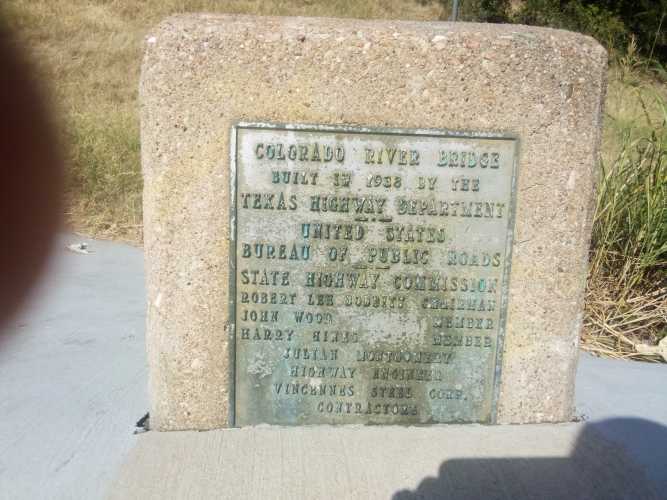
Next up was the biggest landmark on 183 Trail, the Montopolis Truss Bridge. Listed in the National Register of Historic Places, the bridge was built in 1937-38 to replace the original bridge after it was destroyed by floods. Here is a gallery of the bridge itself, the Colorado River it crosses, and a plaque from the opening. And my blurry index finger.
183 Trail continued south past the bridge all the way down to Austin-Bergstrom. As you can guess, there was a fair amount of traffic on that portion on 183. And that pretty much wrapped up the adventure for the day.
I have a few thoughts about this trail in general. It really felt like they built US 183, and then someone decided or heard about some kind of program that gave out federal grants for trails. So they tried to reach out and grab that money by sticking some signs on the side of the road and claiming this was a trail. 183 trail is not a trail, it’s just a sidewalk on the side of a road. And, you know, I have no problem with it being the latter. My only problem is when you claim to be the former.
It was a difficult trail because at every road crossing the trail sloped up to the elevated intersection, which was great because the walk was challenging. No trees meant the sun beat down constantly. I began right around sunrise, but by the last few miles the heat was nearly unbearable. I was stopping to drink water more frequently than normal. All in all; good workout, mediocre experience, but I did learn some things.
Here is something that is tangentially related to hiking. Do you have any idea how to find your bearings and direction if your compass and GPS stop working? Obviously you can, because people did just that long before compasses and GPS were a thing. Polynesian seafarers successfully navigated the open Pacific 5000 years ago. That was way before Waze.
Here I’ll provide some tips that should help you survive in the worst possible hiking scenario: you get totally lost and have no power or compass. None of these methods will drop a giant pin where you need to go, but they will keep you alive if used correctly.
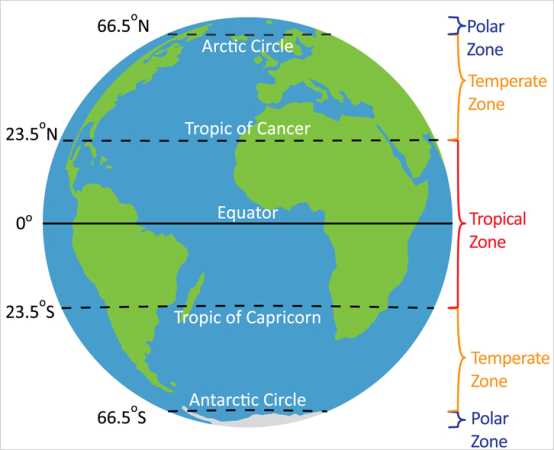
Before we start I want to go over some terminology you will need to understand in order for these lessons to make any sense. Firstly, the Earth is a sphere. Sorry flerfs. The equator goes around the middle of the earth and divides it into northern and southern hemispheres. North America, Europe, the Middle East, and continental Asia are all entirely located within the northern hemisphere. Australia, Antarctica, almost all of South America, and about a third of Africa are in the southern one. If you are familiar with African geography, Lake Victoria sits just about right at the equator.
Lines of latitude run east-west and divide the earth. The equator sits at 0 degrees latitude with the north and south poles at 90 degrees north and south respectively. 23.5 degrees north of the equator is a line of latitude called the Tropic of Cancer. Similarly, the Tropic of Capricorn sits at 23.5 degrees south latitude. The region between them is unsurprisingly called the tropics. The other important lines of latitude are the Arctic and Antarctic Circles, sat at 66.5 degrees north and south respectively. Everything north of the Arctic Circle or south of the Antarctic Circle is called polar regions. Everything between the tropics and the polar regions is known as the temperate region. Although I’m not sure how many people would describe Duluth, MN in the winter as “temperate”.
Thanks for bearing with me on that. It is important because some of these methods will or won’t work in certain regions because of spherical geometry. There are also quite a few cases where you’ll need to do something one way in one hemisphere and then do it “backwards” in the opposite one.
Generally speaking the best conditions in which to have no idea where you’re at are clear, sunny days. Barring that, the next best thing is a cloudless night with as many stars visible as possible. The worst conditions are overcast days and nights. This makes sense since the main ways to orient yourself involve using the sun and prominent stars. With that in mind, we’ll go over tips that you can use when conditions vary from best to worst.
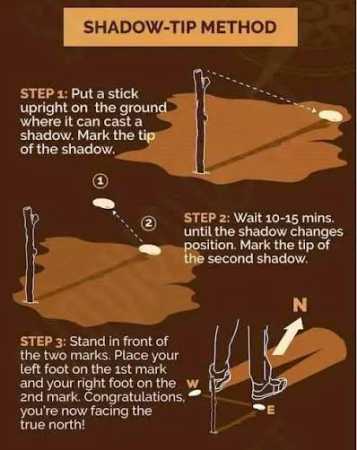
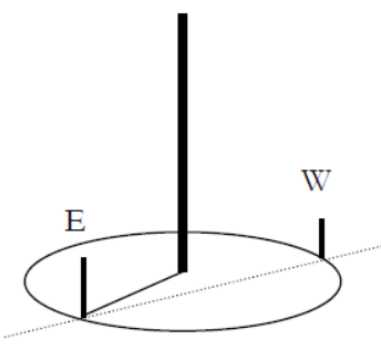
First up is the shadow tip method. This works during the day and you only need enough sun to be able to cast a shadow, even if it is a faint or intermittent one. Place a stick vertically into the ground and put a small rock where the end of the shadow falls. This is your WEST. Wait patiently for 15 minutes or so until the shadow has moved a few inches and then place another rock on the new shadow tip. This is your EAST. Draw a line between the two rocks. Stand with your left foot on the west rock and your right foot on the east rock. Straight ahead is NORTH and behind you is SOUTH.
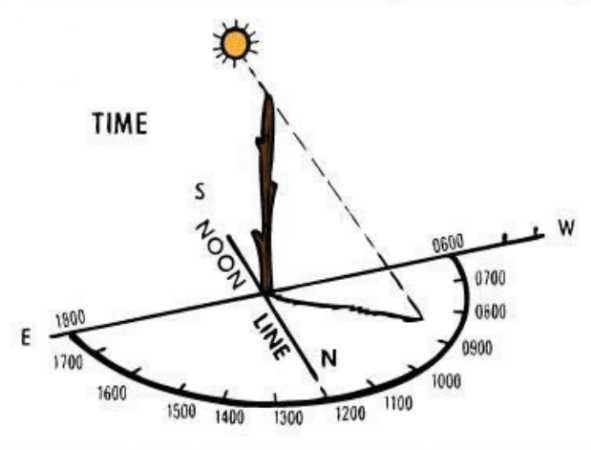
You can draw a north-south line perpendicular to your east-west line. Put a second stick vertically into the ground at the intersection of those lines. Cant the stick slightly towards north in the northern hemisphere or towards south in the southern hemisphere. Draw a semicircle going from 0600 in the WEST to 1800 in the EAST. The shadow of that second stick will give you a rough approximation of the current hour. This method is more accurate the closer it is to noon and the closer you are to an equinox.
There is an advanced version of the shadow tip method called equal shadow method. For this to work, you need to begin within ten minutes before solar noon (when the sun is at its highest point). Just like before you put a stick in the ground, but you need to make sure the shadow it casts is no more than 12 inches long. Mark the tip of the shadow with a rock; this will represent WEST again. Using a piece of string, trace a circle around the stick with radius equal to the length of the shadow.
As noon approaches, the shadow will decrease in length and then start to increase again. Mark where the shadow touches the circle again; this is EAST. From here you can discern NORTH and SOUTH the same way as before.
Equal shadow method is more accurate than shadow tip, but at the cost of taking longer, using an extra piece of string, and needing to be done at a certain time of day. Both shadow tip and equal shadow can be done anywhere on earth, but they are much less reliable in the polar regions due to the position of the sun in the sky.
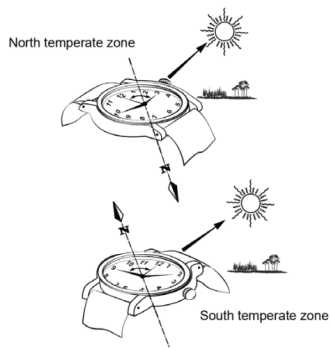
Maybe you don’t like sticks. Then this next method is for you. It is called the watch method. You need to be able to read an analog clock face, which might eliminate any readers under the age of 35. If you do not have a watch, you can draw a picture of a watch showing the current time so you still need to know the exact time. One last thing is you need to be using standard time, so if you are on daylight savings then move the watch back one hour.
This is hemisphere dependent. If you are in the northern hemisphere, take your watch or picture of the clock face and aim the hour hand at the sun. Midway between the hour hand and 12 will be SOUTH. If you are in the southern hemisphere, point 12 at the sun. Midway between 12 and the hour hand will be NORTH. This method requires you to be able to see the sun and only works in the temperate zones.
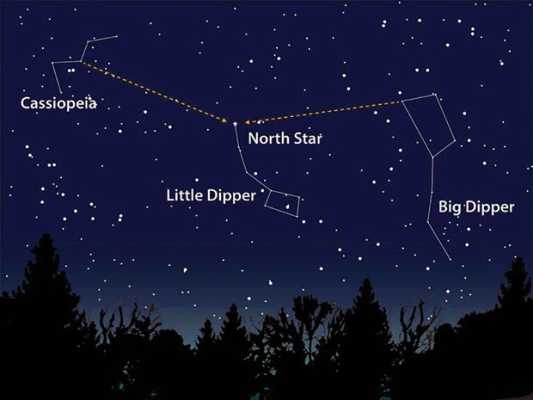
Next up, let’s go over what you do during the roughly 50% of the time that there is no sun. At night your best friends will be the North Star and the Southern Cross.
The North Star (Polaris) is a part of the Little Dipper (Ursa Minor) constellation and always sits in the direction of NORTH. A good way to find it in the night sky is to remember that it sits as many degrees above the horizon as degrees you are above the equator. For example, at the north pole Polaris is directly overhead (90 degrees) and at the equator it sits right on the horizon (0 degrees). In Austin you can find it about 30 degrees above the horizon, or a third of the way up. Once you find the North Star you can use it to orient yourself and find the other cardinal directions.
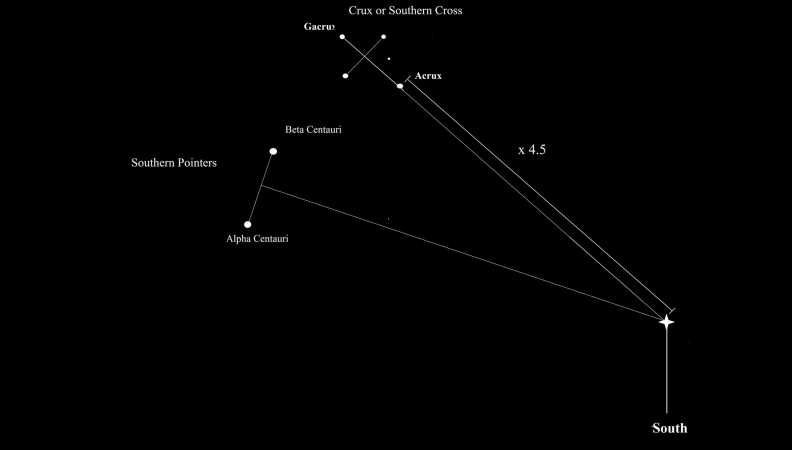
The Southern Cross (Crux) is a constellation seen only in the southern hemisphere. But if you’ve ever seen the Australian flag you know what it looks like. Fortunately, it contains four of the brightest stars in the southern hemisphere. Now it would be very simple and elegant if I could tell you something like how the Southern Cross sits exactly at south the same way Polaris sits at north. Sadly, this is anything but simple and elegant.
To find south using the Southern Cross you have two options. First, you can extend the long axis of Crux out for another 4.5 lengths and that will end above south. If you don’t want to do that, you will need to find another constellation called Centaurus. Two stars in Centaurus (Alpha and Beta Centauri) can be used as pointer stars. Draw an imaginary line segment between those two stars. Extend a perpendicular line from the midpoint of that segment; where it crosses the extended long axis of Crux will be SOUTH.
Like I said, this method is anything but simple and elegant. For the sake of simplicity, try to get hopelessly lost at night in the north if you can. Both of these methods work in any region but the constellations are tougher to see the closer to the equator you are. Also, you should stop and recalibrate often, especially in the southern hemisphere.
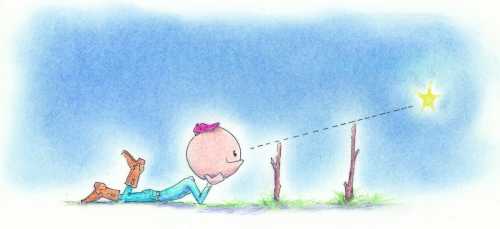
The next nighttime navigation method requires more materials but does not require you to identify any stars or calculate the lengths of any major axes. It also works the same way in both the northern and southern hemispheres. This method is called LURD, which stands for Left Up Right Down.
You identify a star, pretty much any star except Polaris. Place a stick vertically into the ground so that its tip is at eye level while seated. About 2 feet or so is an ideal stick length. Pick your star of interest and line it up so it is at the tip of the stick while you are seated. Now take a second stick, about 3-4 feet long. Line that stick up behind the first one so that the star is located on the tip of both sticks while you are seated.
Good. Now wait about thirty minutes. In that time, your star of interest will have moved. Figure out which way it moved and use LURD to figure out which way you are facing.
If the star moved LEFT, you are facing NORTH
If the star moved UP, you are facing EAST
If the star moved RIGHT, you are facing SOUTH
If the star moved DOWN, you are facing WEST
If the star moved up and right, it means you are facing to the southeast. If it moved left and down, you are facing northwest. This method consumes a lot of time both in the waiting for the star to move and in setting up the two sticks correctly.
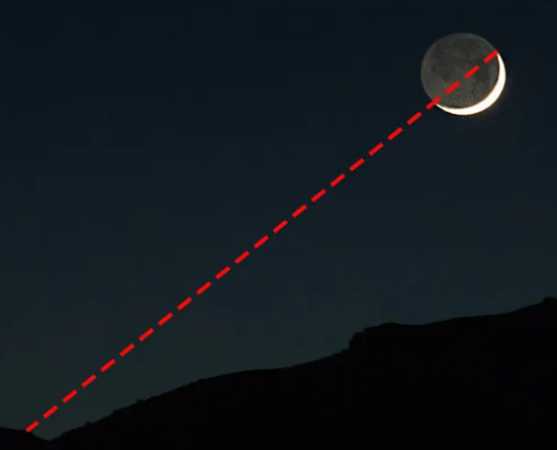
There is one last method you can use on a clear night. This is called horns of the moon. This only works during a waxing or waning crescent moon, which is about one quarter of the time. Draw an imaginary line between the two tips of the crescent moon and extend that line down to the horizon. In the northern hemisphere, that point on the horizon will be SOUTH. In the southern hemisphere that point will be NORTH. Doesn’t work during a full moon for reasons that should be obvious.
Now let’s look at what to do if it is too cloudy to see the sun or the stars. Your best bet is to use clues from nature. These are obviously going to lead to sub-optimal results, so anything you glean should be double checked as soon as you can get somewhere without cloud cover.
Firstly, a “DON’T”. Don’t use the old wives’ tale about moss growing on the north side of trees. Moss is promiscuous and grows everywhere it feels like, as long as it gets enough sun. Seeing moss is not a reliable enough indicator of north to start trekking off in whatever direction it indicates.
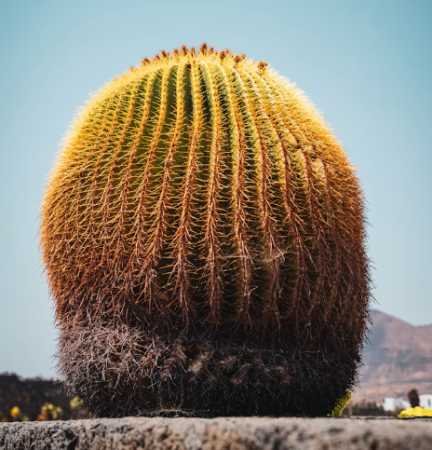
In the early summer, north-facing hillsides will retain snow longer than southern facing ones in the northern hemisphere. In the southern hemisphere, the opposite is true. Tree stumps will have wider spaced growth rings on whichever side faces the equator. So, south in the northern hemisphere and north in the southern. Barrel cacti in the Mojave (southwestern USA) grow towards the south.
Lastly, I’m going to discuss improvised compasses. I am going to talk about these last because I have the least amount of confidence in this method of finding your bearings. Basically, only try this if every single method listed above has proven ineffective. I have never gotten an improvised compass to tell me anything useful about which way anything was.
You can magnetize a needle by rubbing it with a magnet or, barring that, a piece of silk or fur. You will need to rub the needle at least 50 times in the same direction in order to magnetize it. Then you will want to carefully lay the magnetized needle on top of a leaf in a puddle or pool of water. If you wait, the needle will align itself along a north-south line.
For obvious reasons, the puddle or pool needs to be as far removed as possible from any metallic or magnetic items like cars, camping gear, bleachers, or the magnet you used to magnetize it in the first place. Again, I have never gotten this to work for me. But if you are so desperate you got all the way to this part of the post, you might as well try it.
One last thing. I used some pictures here that I got from ATP 3-50.21, an Army Training Publication that is freely available to the public. It has to do with survival in all sorts of conditions and I’d recommend downloading it. Doubly so if you plan to find yourself in an Alive or The Mountain Between Us type situation.
 Gene Hikes the Appalachian Trail
